

How to connect to utepsecure using an Windows 7
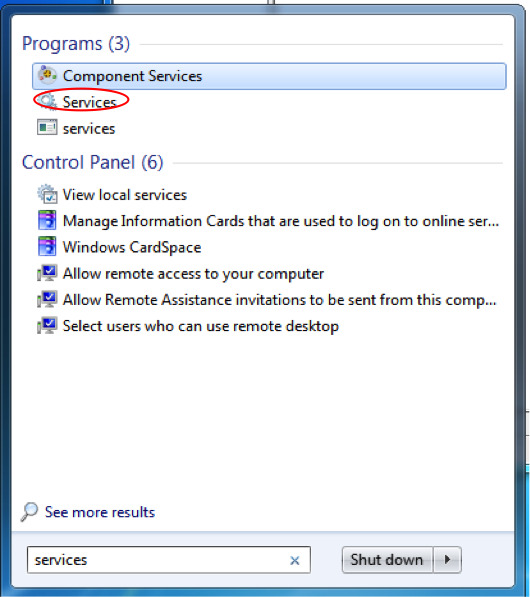
1. Before any Windows 7 device can authenticate on utepsecure, a Windows Service must be started for authentication purposes. Open the start menu, and begin typing "services.msc". Click on Services.
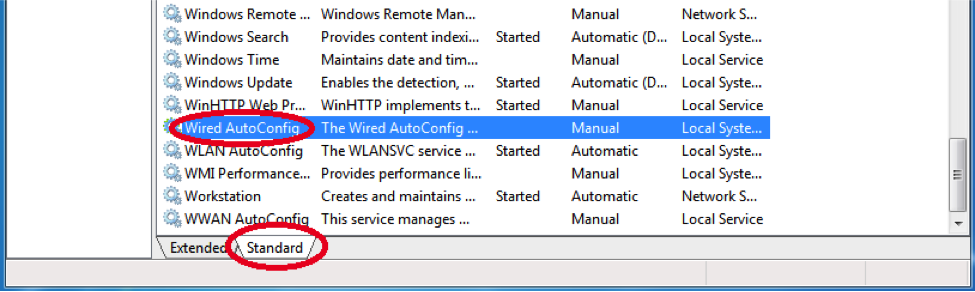
2. Once the window is open, on the bottom there will be two tabs called "Extended" and "Standard". Click on Standard and scroll down until you see Wired AutoConfig.
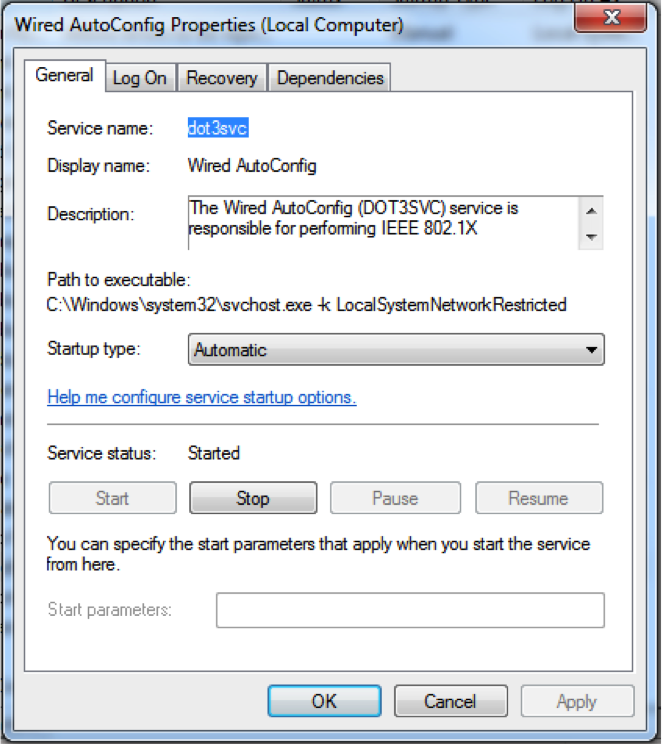
3. Double-click it to open a window. Make sure the service has been started, and is set to automatically start each time Windows boots up. If it is not, change the Startup Type to Automatic. If the service is not started, click on the Start button to start the service. Click Apply. Click OK to close the window. This method is used to authenticate you on the wireless network.
4. After completing the previous step, you will be returned to your list of networks and it will show you are connected to utepsecure. It is recommended you Forget utepwl1 so your device will prefer utepsecure as its primary wireless network. Make sure your settings are identical to the image below.
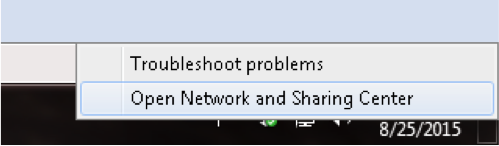
5. After those settings have been set, close those windows and right-click on the network icon in the bottom right corner of your screen and click Open Network and Sharing Center.
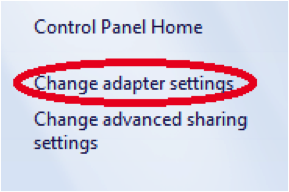
6. In this window, click on Change adapter settings. Right-click on Local area connection and select Properties.
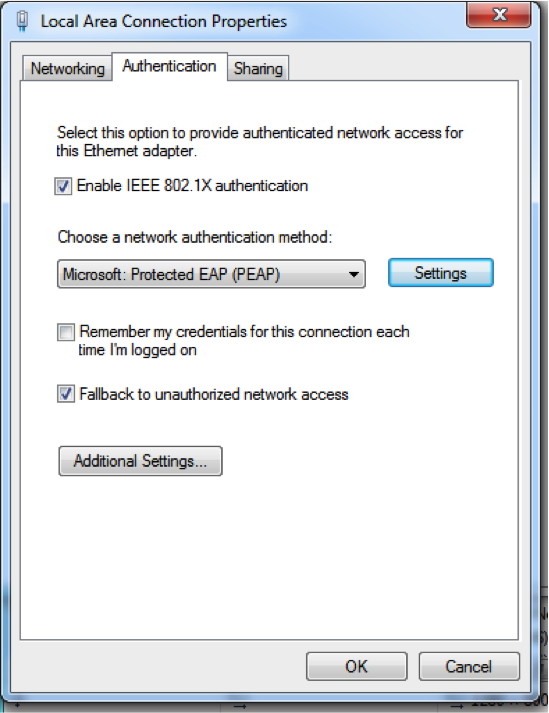
7. From Properties, click on the Authentication tab. If this tab is missing, go back to steps 1 and 2 to repeat the procedure. If steps 1 and 2 are skipped you will not have the Authentication tab under Properties.
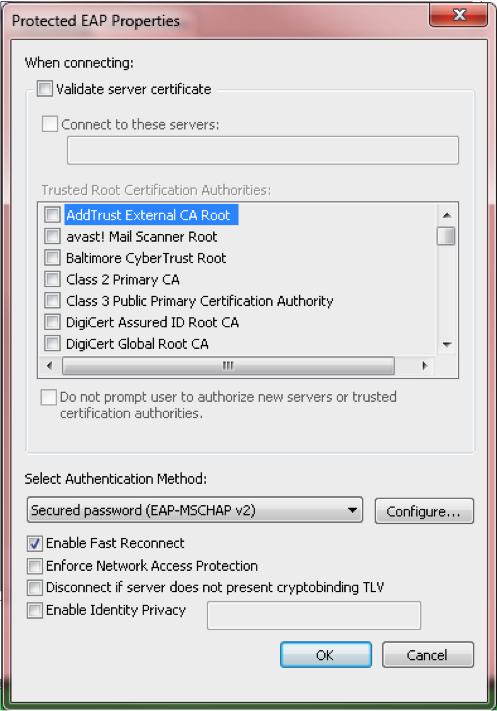
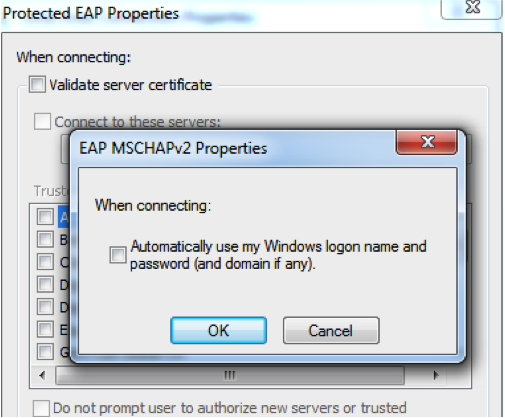
From this point, Click on Settings next to Choose a network authentication method. Make sure your settings are the same as the ones provided in the image. Once complete, click on Configure… and uncheck the box that says "Automatically use my Windows logon name and password (and domain if any)." Click OK, and click OK again on Protected EAP Properties.
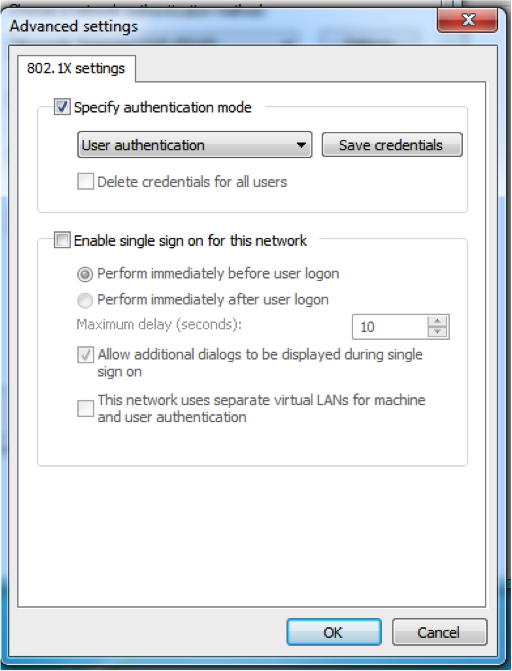
8. Click Ok once complete, next click on Additional Settings under the Authentication tab. This will open a new window that says Advanced Settings. In this window, check Specify authentication mode and select User authentication. Click on Save credentials. In the new window, enter your UTEP credentials and Click OK. Click OK again once that is done.
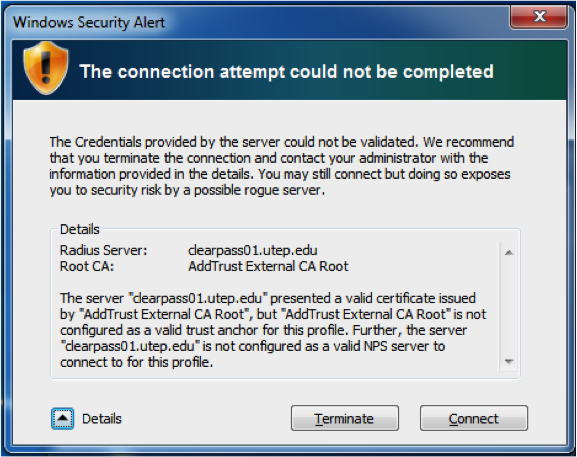
9. Once these steps have been completed you will be able to connect to utepsecure. Click on the wireless icon and select utepsecure. It will now prompt you for credentials. Enter your UTEP username and password, you may be prompted to trust a certificate once or twice. Click continue and you will be able to connect to the network.
Click here to go back to utep secure FAQ page

UTEP Home | State Reports | UT System | Customer Service Statement | Site Feedback | Required Links |CLERY Crime Statistics
The University of Texas at El Paso | 500 West University Avenue | El Paso, Texas 79968 | (915) 747-5000